Google has recently announced its next version of Android, and that name, obviously, is Android O. Obviously, this won’t be the last name of the following version of Android Just, for now, it’s simply called as Android O. The initial segment of 2017’s rendition knock, referred to just as Android O for the present, was quite recently declared. Also, same as the last two years, developer preview’s are live for supported devices. This year Android O supported devices are Nexus 5X, Nexus 6P, Pixel, and Pixel XL, Pixel C tablet, and the Nexus Player.
Now Google has released Android O developer preview for Google Pixel and Nexus Devices. For those that know about flashing, there’s truly nothing surprising about this procedure with Android O. In case you never flashed any factory image at all, then this guide will help you to flash Android O.

Android O Developer Preview Highlights
Table of Contents
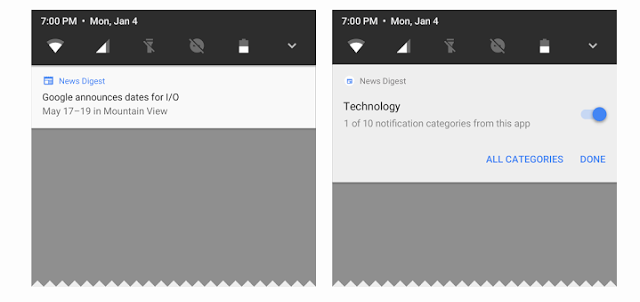
- Notification channels: Android O also introduces notification channels, which are new app-defined categories for notification content.

- Autofill APIs: Users now select an autofill app, similar to the way they select a keyboard app. The autofill app stores and secures user data, such as addresses, usernames, and even passwords.
- Font resources in XML: Apps can now use fonts in XML layouts as well as define font families in XML — declaring the font style and weight along with the font files.
- Background limits: Android O puts a big priority on improving a user’s battery life and the device’s interactive performance. Background limits represent a significant change in Android.
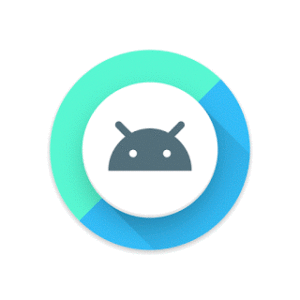
- Adaptive icons: To help you integrate better with the device UI, you can now create adaptive icons that the system displays in different shapes, based on a mask selected by the device.


- Wide-gamut color for apps: Android developers of imaging apps can now take advantage of new devices that have a wide-gamut color capable display.
- PIP for handsets and new windowing features: Picture in Picture (PIP) display is now available on phones and tablets, so users can continue watching a video while they’re answering a chat or hailing a car.
- WebView enhancements: Android O, Google enabling multiprocess mode by default and adding an API to let your app handle errors and crashes, for enhanced security and improved app stability.
- Connectivity: For the ultimate in audio fidelity, Android O now also supports high-quality Bluetooth audio codecs such as LDAC codec and added new Wi-Fi features as well, like Wi-Fi Aware, previously known as Neighbor Awareness Networking (NAN).
- Keyboard navigation: Android O building a more reliable, predictable model for “arrow” and “tab” navigation that aids both developers and end users.
- Java 8 Language APIs and runtime optimizations: Android now supports several new Java Language APIs, including the new Java.Time API. In addition, the Android Runtime is faster than ever before, with improvements of up to 2x on some application benchmarks.
- AAudio API for Pro Audio: AAudio is a new native API that’s designed specifically for apps that require high-performance, low-latency audio. Apps using AAudio read and write data via streams.
DISCLAIMER
TheDroidGuru.com is not responsible for any damage happened to your device(s) while following this guide, Proceed at your own risk.
PRE-REQUISITES
- This Update is only for Nexus and Pixel Smartphones.
- Follow the below Guide Exactly, or else it may lead to brick your device. TheDroidGuru.com is not responsible for any damage.
- We recommend to take complete backup and proceed.
- Maintain 50-60% battery to prevent sudden shutdown between the process.
Downloads
- Nexus 5x – Download
- Nexus 6p – Download
- Nexus Player – Download
- Pixel C – Download
- Google Pixel – Download
- Pixel XL – Download
- ADB and fastboot drivers
Steps to Install Android O Developer Preview for Google Pixel and Nexus Devices
Unlock Bootloader
- First enable the USB debugging, and OEM unlock in developer options, to do that you have to enable ‘Developer Options’ by going to ‘About phone’ in settings and tapping build number seven times.
- Now go to Developer options in settings and Enable USB debugging and OEM unlock.
- Download and Install ADB drivers.
- Go to Adb folder (Usually ABD folder will be in C:\adb). Note: Make sure that you have installed ADB Drivers.
- In the ADB folder and long press ‘shift’ key and right mouse click anywhere in the folder and click on ‘Open Command window here.’
- Now connect your device to the PC using USB cable and execute the following command in the command prompt to boot your device into fastboot mode.
adb reboot bootloader
- Execute the below command to unlock OEM
fastboot oem unlock
Installing Android O
- Download the Android O factory image for your device and extract the downloaded zip file it.
- Connect your device to the PC using USB.
- Go to Adb folder (Usually ABD folder will be in C:\adb). Note: Make sure that you have installed ADB Drivers.
- Save the extracted files in ADB folder
- Enter into the fastboot mode by press and hold ‘Volume Up + Volume Down + Power’ buttons or you can execute the following command.
adb reboot bootloader
- In the ADB folder and long press ‘shift’ key and right mouse click anywhere in the folder and click on ‘Open Command window here.’
- Execute the “flash-all.bat“, It will start flashing
- If flash-all.bat method doesn’t work, execute all commands manually
- First, flash the bootloader and the radio
fastboot flash bootloader <bootloader file name here>.img
fastboot flash radio <radio file name here>.img
fastboot reboot-bootloader
- Flash the recovery, boot, and system images by executing the following commands
fastboot flash recovery recovery.img
fastboot flash boot boot.img
fastboot flash system system.img
- Full wipe, cache and user data by executing the following commands
fastboot flash cache cache.img
fastboot flash userdata userdata.img
- Now Reboot your device by executing the following commands
fastboot reboot
- Done
Teja
Teja is a full-time blogger.He likes learning new things and believes that there can never be an end to learning.
