How to move the Spotify cache and Google Play Music to Android SD, We are increasingly dependent on the cloud when it comes to using our smartphones. Thanks to all the platforms that offer content from the cloud (both on demand and streaming) as our devices increasingly have higher capacity data connections, we increasingly prefer to use platforms that deliver content from the cloud, such as Spotify for music or Google Photos to take our pictures with us, instead of carrying them in the storage memory of our device.
When we use cloud-based applications such as Spotify or Google Play Music to listen to streaming music when we go on the street, these applications, even if they download the data from the cloud, must save them all somewhere in order to play it, and if we want to return to listen to the same song, not have to download it again. These general data these applications are what are known as cache, or temporary files, files generated by these applications.
Also Read: How to get unlimited storage in Google Photos
Unfortunately, the more we use these streaming applications the more space your temporary data occupy in our phone, which can be a serious problem if, for example, we have many applications installed and/or our smartphone has little storage space.
Here’s how we can solve this problem by moving the temporary and cache data of the most used applications to listen to streaming music, Spotify and Google Play Music, to the Android SD card to save space on our device.
How to move to SD (or delete) temporary data and Spotify cache in Android
Spotify is the leading application for streaming music. This application allows us to listen for free (although with advertising and some limitations) or paying the subscription all the music we want from our device, anywhere, simply having an Internet connection, whether over Wi-Fi or data.
During its operation, Spotify unloads and stores in the memory of our device a great amount of data, data that can be occupying from several hundreds of Megas to several gigas according to the music that we have listened to. This takes up the valuable and limited storage space of our device, although, fortunately, we can either delete it manually or move it to a memory card to free this space in the internal memory of the device.
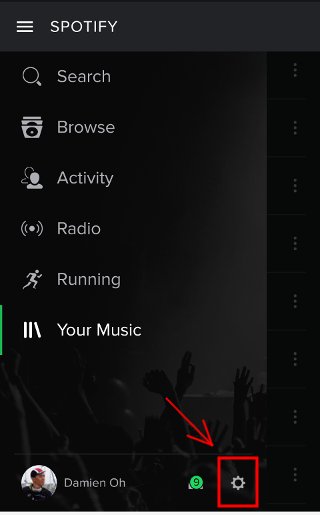
To do this, simply enter the Spotify app on our Android and, under the Settings section, scroll to the bottom, where we will see the options related to data management.

The “Storage” option will allow us to choose where we want to save the temporary data of Spotify, whether in the internal storage memory or in an external memory card that we have connected to our device.
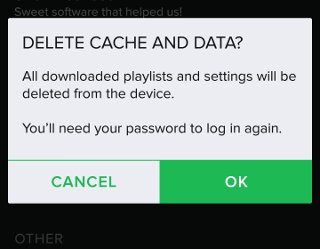
On the other hand, the option ” Delete cache and saved data “, as its name indicates, will allow us to erase all this data from our device to free space so that, if we want to return, for example, to listen to a song we have to download it again.

Ready. With this simple trick, Spotify’s cache and temporary data will no longer occupy a huge amount of storage on our Android smartphone.
How to move to SD (or delete) temporary data of Google Play Music cache on Android
Google Play Music is not an application as well known and used as Spotify since, among other things, it can not be used for free, having to pay less to access its database. However, this application has a very interesting function, and is that for free we can store up to 50,000 songs in your cloud to listen to streaming from this application for free.
Whether we use the Google Play Music library, we access from this application to the personal songs that we have uploaded to your cloud, this application must store temporary files in our device, files that can take up enough space in Android’s internal memory.
As with Spotify, from the Google Play Music Settings options, we can also change the path where all these temporary files will be saved, as well as delete them when we see that they take up too much storage space.
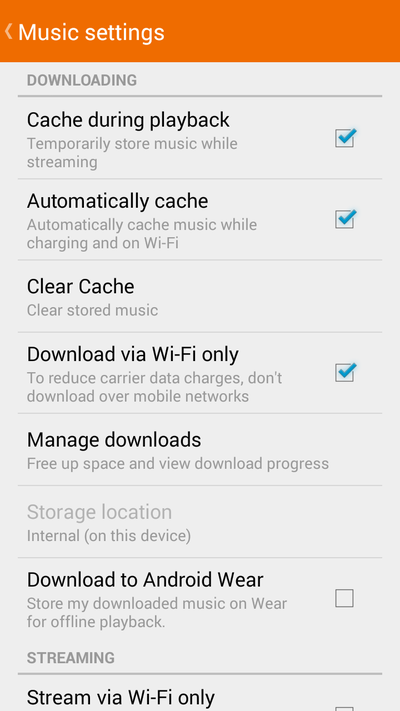
Within the options of this music streaming app, we will find a section called “Downloads” from where we can manage all that.

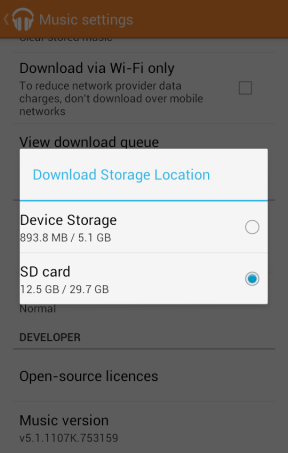
Scroll down a little and From the ” Storage location ” section we can choose if we want our data to be stored in the internal memory of Android or, otherwise, in an external memory, such as a micro-sd card that we have connected.

In addition, if we press ” Empty cache ” we can delete all this temporary data, releasing all the space used by the cache of this program in our device, taking into account that when we want to replay a song we will have to download the data again with the use of data that this supposes).
Thanks to these two simple tricks, many of which we often use streaming music playback applications can forget about space problems.
Varun Kesari
Blogger | Youtuber | Music lover | Tech enthusiastic | Proud To be INDIAN
