Download and Install Huawei Mate 9 B198 Nougat Update [Europe], European Huawei Mate 9 with the model number MHA-L09 has started receiving latest B198 Firmware Update.The update is currently available in the Europe.This OTA Firmware Update is based On EMUI 5.0 (Android 7.0 Nougat).If you live in that region then you may have already received the firmware update.Now you can manually Update Huawei Mate 9 to B198 Nougat Update | MHA-L09
This Firmware update comes with the latest Google security patch based on the latest EMUI 5.1 OS (Android Nougat 7.0).This also includes all popular nougat features. It also comes with stability and performance improvements.
Also Read: Download and Install Huawei Mate 9 Android 8.0 Oreo Firmware (8.0.0.321)
![Download and Install Huawei Mate 9 B198 Nougat Update [Europe]](https://thedroidguru.com/wp-content/uploads/2017/11/huawei-mate-9-2.jpg)
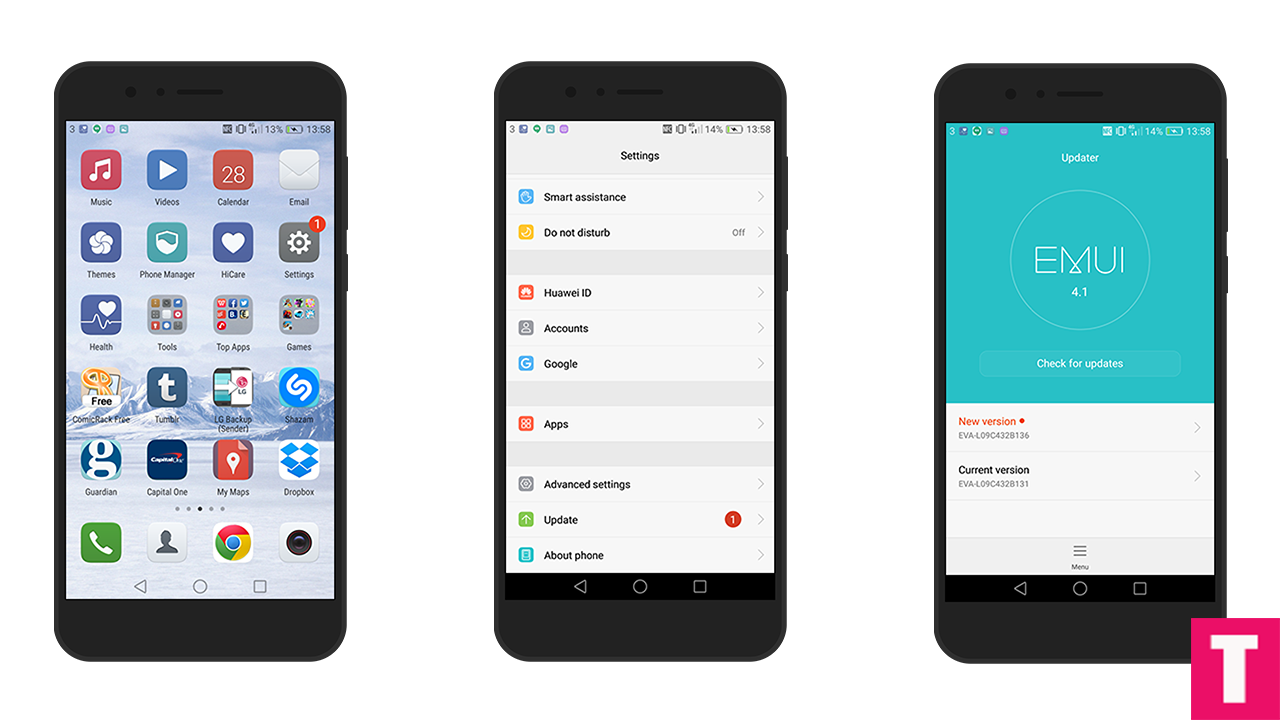
This official B198 nougat Update is rolling out via OTA (Over-the-air) in phase wise manner. You can manually check whether the update is available in your region or not. To check the update Go to Settings –> About Phone Section –> Software Update.

If there is no update yet in your region then you can wait for few days for the update to come or you can follow our guide to manually Update Huawei Mate 9 to B198 Nougat Update | MHA-L09
About The Firmware
Table of Contents
- Device – Huawei Mate 9
- Model – MHA-L29/MHA-L09
- Android Version – 7.0
- EMUI Version – 5.0
- Firmware – B198
- Build Number – MHA-L29C432B198/MHA-L09C432B198
- Region – Europe
- Status – Official
- Type – Full firmware image
- Changes – Changelog
Note
- This Update is only for Huawei Mate 9 | MHA-l09 so don’t try on other models.
- Maintain 50-60% battery to prevent sudden shutdown between the process.
Disclaimer
Follow the below Guide Exactly or else it may lead to brick your device.Theedroidguru should not be held responsible for any damage.
Download Huawei Mate 9 B198 Nougat Update File
1) Download B198 Update for Huawei Mate 9 MHA-L09 (MHA-L09C432B198) –
2) Download B198 Update for Huawei Mate 9 MHA-L29 (MHA-L29C432B198) –
How To Flash / Install B198 Nougat Update On Huawei Mate 9 | MHA-L09
METHOD:- 1
Step 1.Enable Developer Option and Android Debugging On your Huawei device
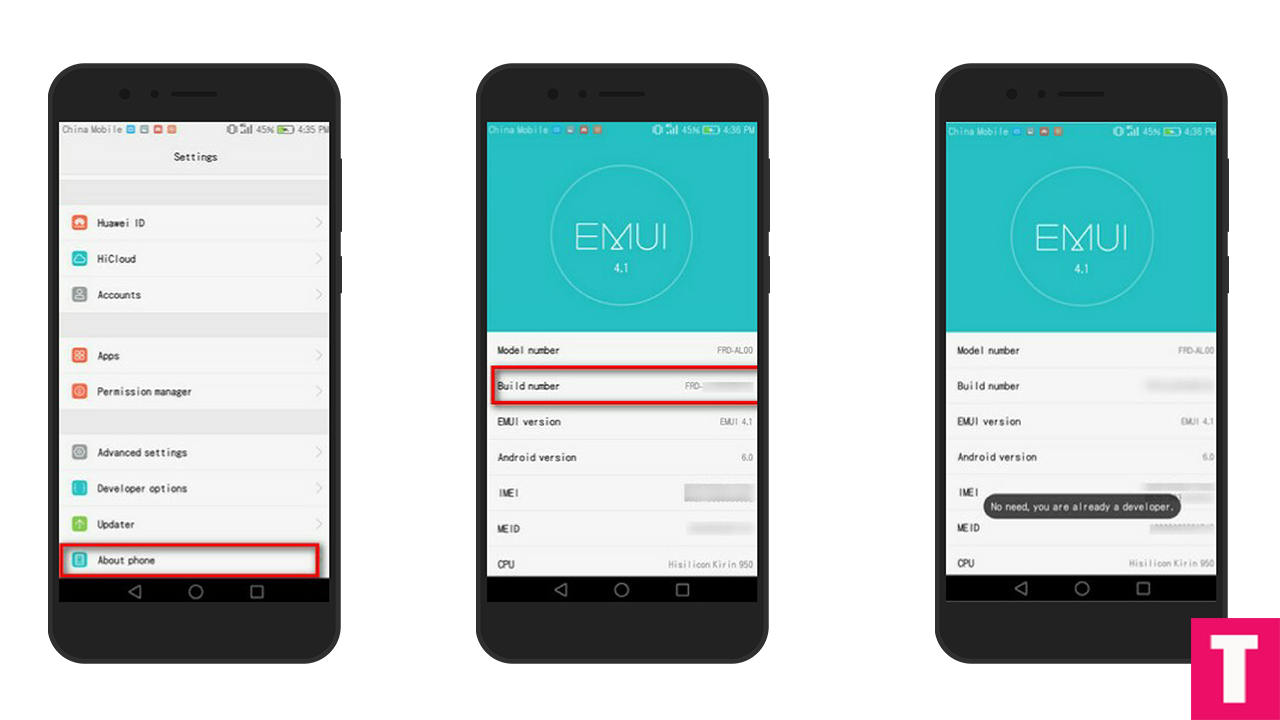
- First, you have to enable the developer option.Go to Settings > About Phone > Build Number then tap on press build number 7 times to enable the developer option

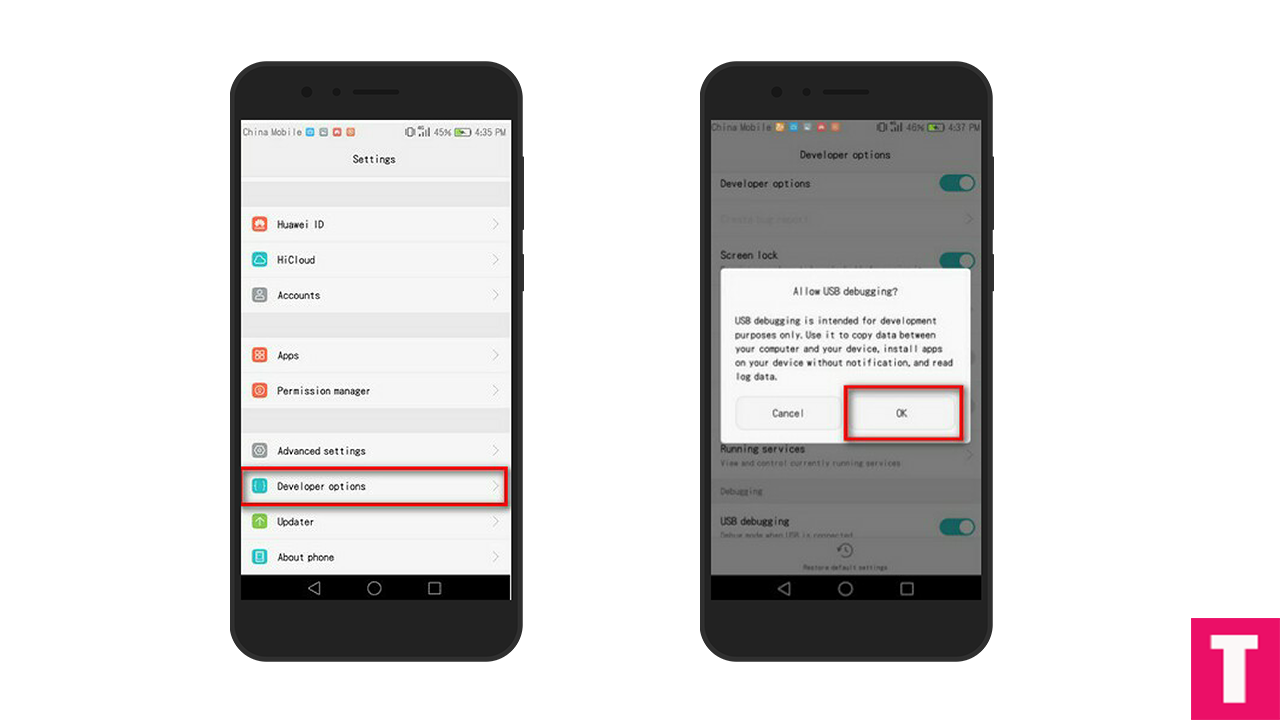
- Now return to the setting’s main menu scroll down, there should be Developer optionavailable above Updater.Now go to Developer option then scroll down to android debugging and enable that.

Step 2.First, connect your Huawei device to PC via a USB cable and create a new folder named “HWOTA” in its external microSD card. (memory card)
Step 3.Download all files from the download section, rename them and copy them to the new HWOTA folder which was created earlier.
Rename > update_full_MHA-L09_hw_eu.zip→ update_all_hw.zip
Rename > update_data_full_public.zip → update_data_public.zip
update.zip (Don’t rename this)
Step 4. Download HWOTA_MHA.zip file and extract to the HWOTA folder from the zip to your desktop.
Step 5.Now disconnect the USB cable from the phone and power it off.
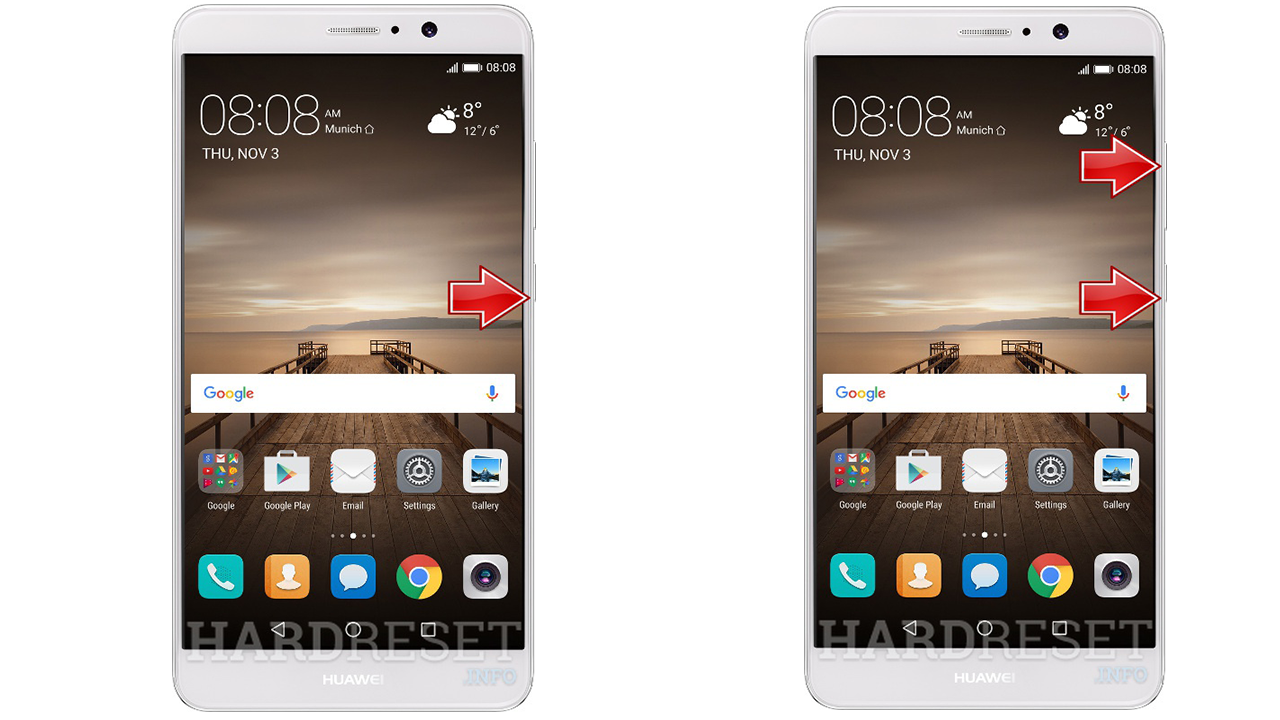
Step 6.Next, again connect your device and Reboot into Bootloader mode by pressing “Volume Down + Power”
Step 7.Open the HWOTA folder you extracted earlier on your computer and execute the update.bat file as administrator (Windows only).
Step 8.The updater window will pop up and ask you to restart your phone into fastboot mode. now press Enter key to continue as you are already in fastboot mode
Step 9.This tool will replace your phone’s stock recovery and then ask you to reboot into TWRP recovery mode.In order to that, disconnect the USB cable and hold the power button to turn the phone off. Then hold Volume up + Power for a few seconds to enter TWRP mode.
Step 10.Once you’re in your device’s TWRP, plug in the USB cable again and press the Enter key twice on your computer.
Step 11.For update source, type 1 and press Enter.
Step 12.In update type selection, type 1 again and hit the Enter key twice.
Step 13.Now your phone will now reboot into its recovery mode and start the update installation process.Wait for the process to finish
Step 14.Once the updating process is completed your device will reboot into the latest updated firmware
Step 15.Done!!!!You have successfully updated your Huawei Mate 9 Plus to B198 Nougat Update.
METHOD:- 2
Step 1.Make sure that your device is bootloader is unlocked and you have a custom recovery (TWRP) installed on your device.
Step 2.Now download Huawei Mate 9 B198 Nougat files from the Download section above and save it on your device.
Step 3. Now Boot your device into TWRP Recovery mode. (First turn OFF your phone.Now press and hold the Power + Volume Up Button for a few seconds, all at the same time.The Huawei logo should appear first and then you can enter into the Recovery Mode screen on your Huawei device)

Step 4. Once you are in TWRP recovery, flash the update.zip file and once flashing is done just flash the second and third firmware file.(Wait until the flashing is completed)
Step 5.Done! Reboot your device, your Huawei Mate 9 should boot into B198 Nougat Firmware.
If you have any question or suggestion regarding this post, feel free to leave that in the comment section below 🙂
Varun Kesari
Blogger | Youtuber | Music lover | Tech enthusiastic | Proud To be INDIAN
