If you’ve ever owned an Android device, then you most definitely know of the numerous secrets that it holds. It all counts right from those nifty little gestures to bigger secrets. One such secret is the addition of a secret, hidden menu, from the very early days of Android. This hidden menu that can be enabled from the Settings app has been famously dubbed as the Developer Options.
Under this hidden list of menu, you can find a never-ending list of really complex customization and other debug-related options. One of the more popular options is called USB Debugging, which basically introduces a system-wide connection from your Android device to a Windows computer, allowing you to do crazy stuff like unlocking the bootloader via ADB and Fastboot.
Finally, to unlock the bootloader of your device, you would also require to find the OEM Unlock button and enable it. In this guide, you will be able to do all those three, and that too under the matter of a few seconds. Let’s begin with our guide on How to Enable Developer Options, USB Debugging and OEM Unlock on Android.
Steps To Enable Developer Options, USB Debugging and OEM Unlock On Any Android
Table of Contents
Note: This will work on most of the android phones including Nexus, Pixels, OnePlus, Samsung, LG and HTC.These are the basic steps to enable usb debugging.
Enable Developer Options
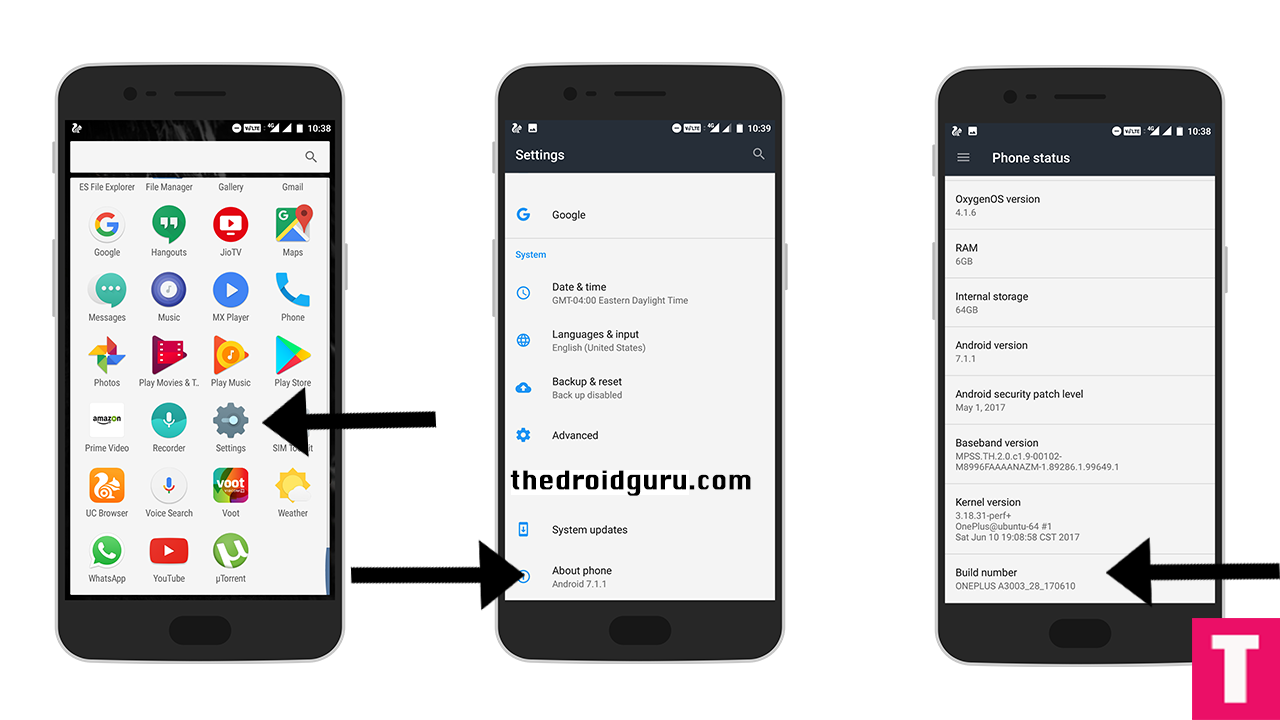
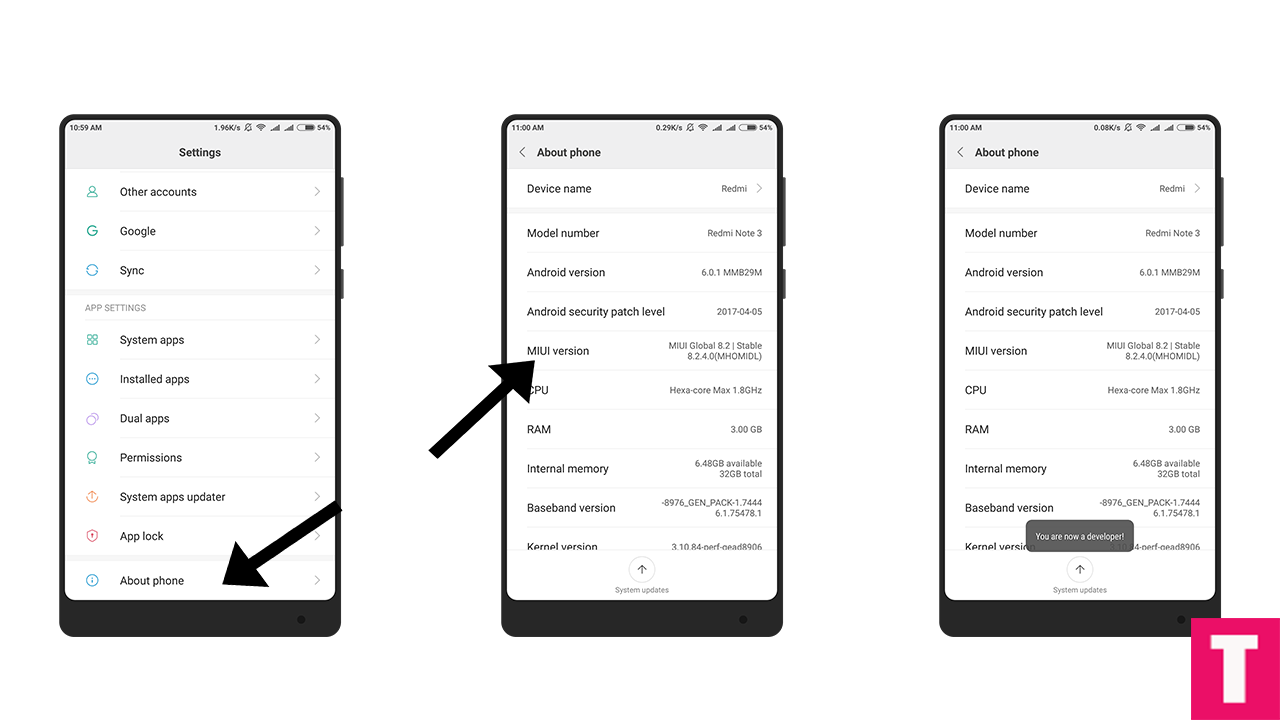
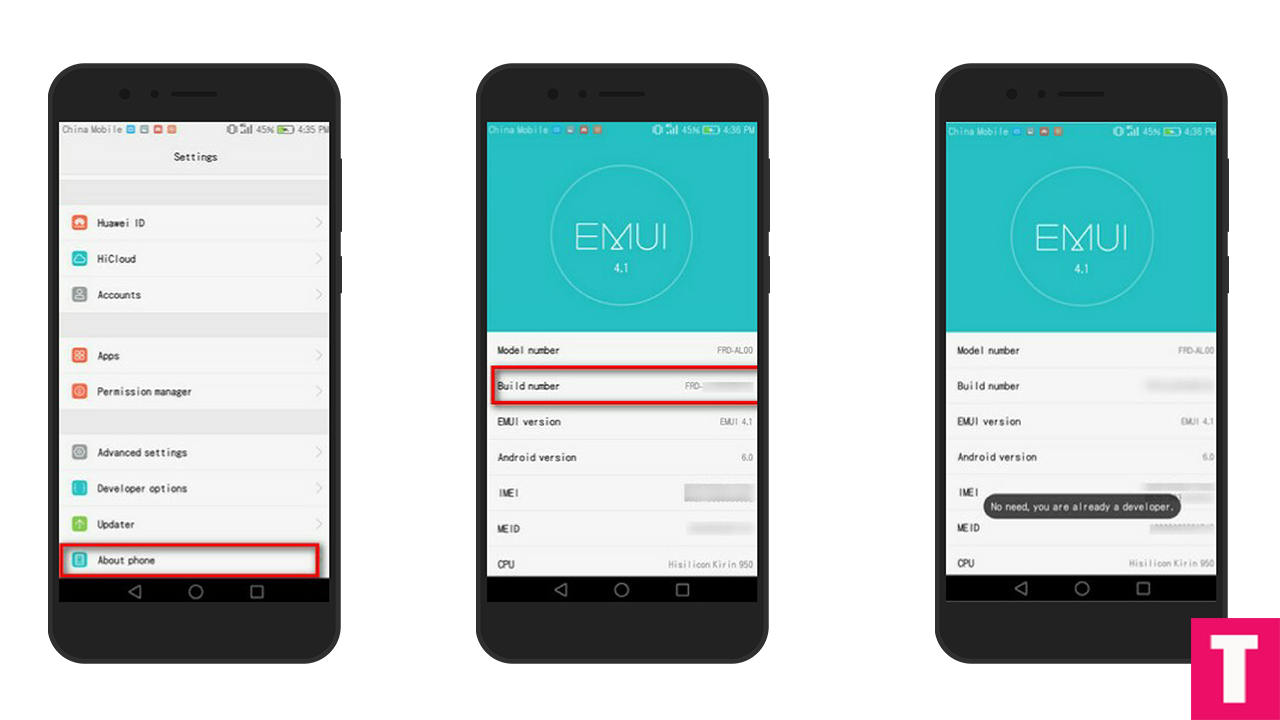
Go to Settings > About Phone > Build Number then tap on press build number 7 times to enable the developer options.
└ In Xiaomi devices you have to tap on MIUI Version instead of build number.
Enable USB Debugging
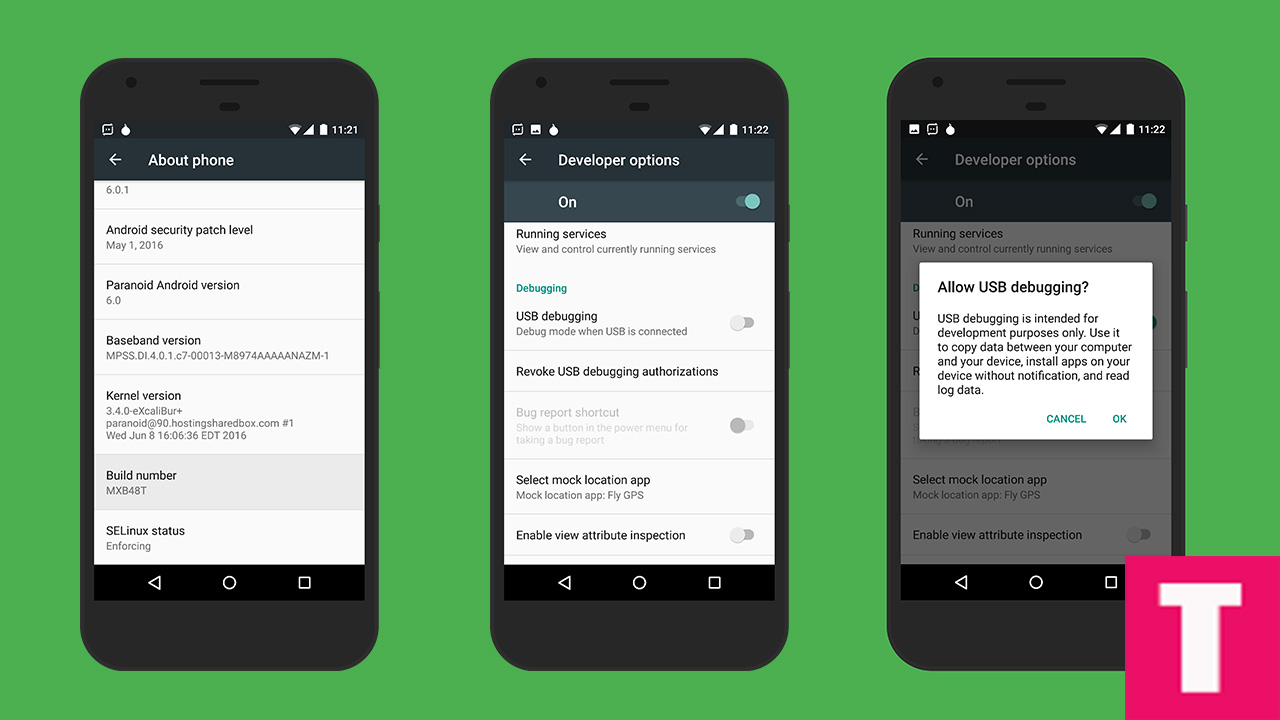
Return to the setting’s main menu and scroll down to the bottom, there should be Developer Options.Now go to Developer option then scroll down to USB debugging and enable that.
Enable OEM Unlock
Go to Developer option > OEM Unlock > Provide Your Lock Screen Unlocking Pin > Now Click on Enable (When the popup appears)
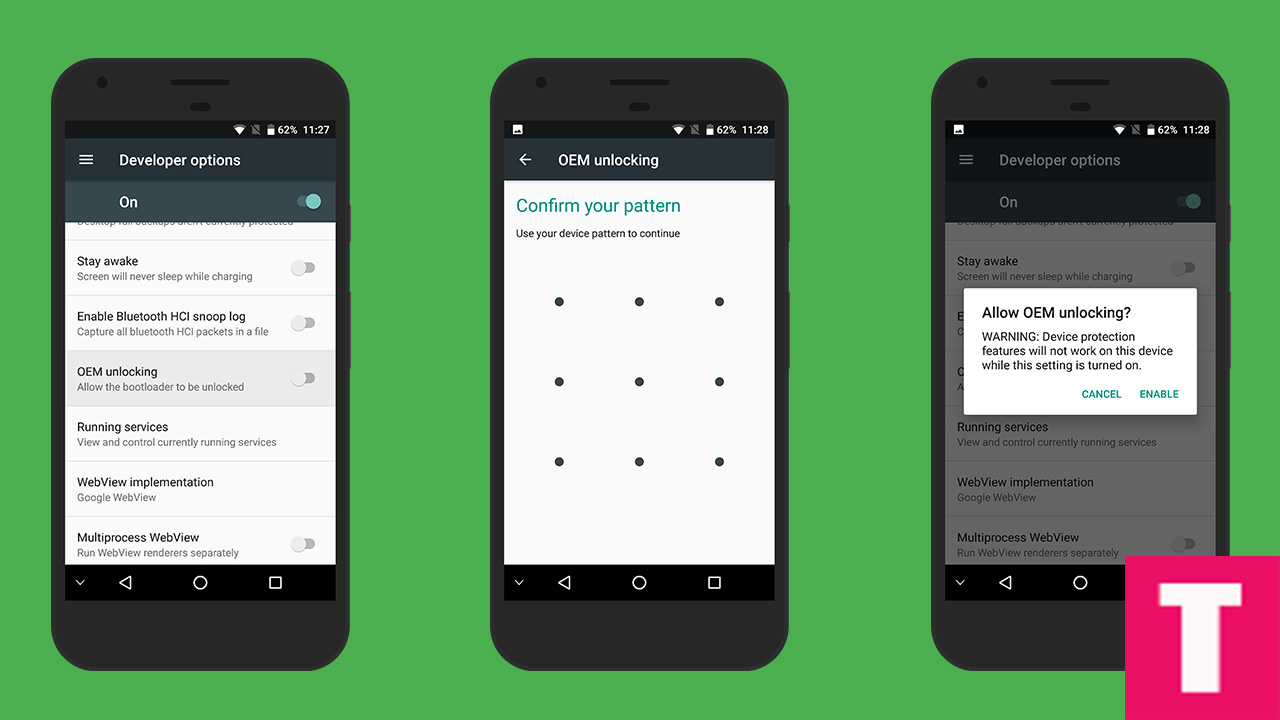
That’s it! Within the matter of a few seconds, you’ve prepared your Android device to be fiddled around with!
Adnan Ahmed
An avid technology reader, author, and admirer, Adnan has been into all-things technology since age twelve. Since then, thanks to the exposure he has been brought into, Adnan now serves as an author on multiple sites including TheDroidGuru. As a passion being developed, he loves filmmaking and cinematography.
